Image-to-Image T-Shirts (2020)
How I made an Augmented Reality t-shirt using Machine Learning
Image-to-Image Translation
Deep in lockdown in 2020, I came across Image-to-Image Translation models in a tutorial covering the "pix2pix" paper. I was immediately excited by it. With a dataset of input/output image pairs, you could train a GAN in a supervised manner to learn the general rules required to translate images of an input distribution to their corresponding output. Amazingly, the same model architecture and training objective could learn translations for different datasets (enabling a wide range of different applications). Examples from the "pix2pix" paper are shown below.
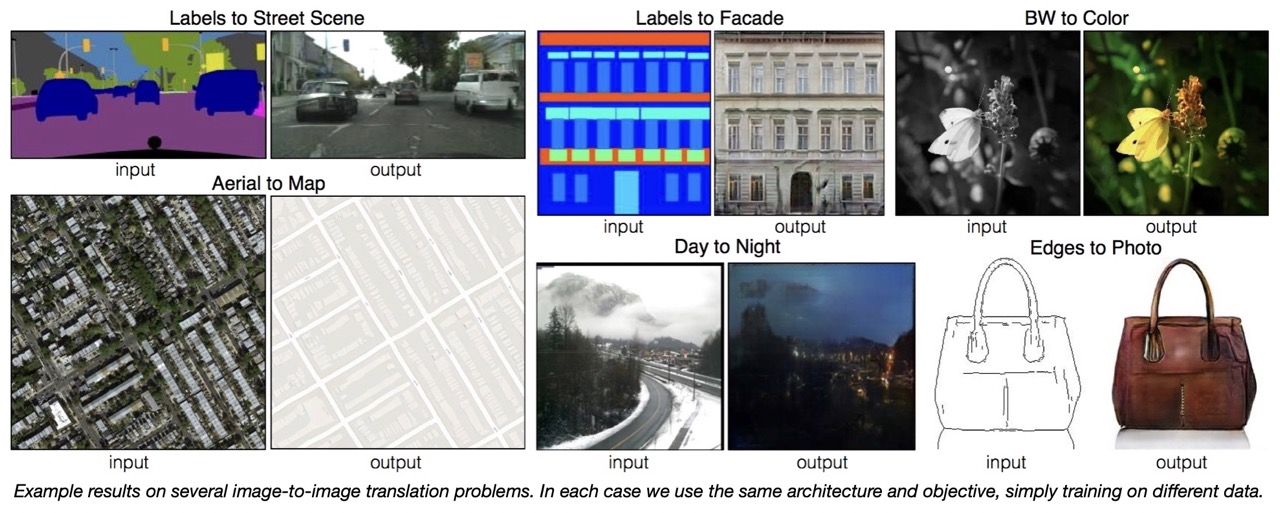
These tasks are highly complex and require a lot of understanding. Colorisation, for example, is like semantic segmentation on steroids! Plus, models would need some physical understanding of light, shadows and specular effecs to colorise convincingly. Image-to-Image Translation looked super powerful and I was itching to get a better understanding by training my own model.
The Idea
I decided to make a t-shirt with augmentable designs (augmentable here as in AR).
It would be a technical challenge for myself and a test of the capabilities of Image-to-Image translation. More importantly, if I could get it working in real time, I'd have a sick gadget to impress people I was on lockdown Zoom calls with.
The model would need to be able to replace a predetermined texture (the base design on the physical t-shirt) with an augmented texture. To make the augmented output look realistic, the model would need to match deformations, occlusions and lighting effects of the original texture while not changing the appearance of the rest of the image. The magic of the "pix2pix" model meant I would only need a dataset of input/output images that captured all these desired characteristics, at least in theory.
Dataset creation
The dataset would need pairs of images that are identical except for where in the input images it showed the base design, the corresponding output images would show the augmented design.
The way to do this would be in simulation. A 3D mesh could be rendered, once with the base texture, and once with the augmented texture to get exact translations. With python scripts in Blender, I could also programmatically render scenes with different camera positions, light effects, and background textures, in order for the model to understand these variables.

However, a crux for realistic t-shirt augmentation was still unsolved - how to capture translations for all kinds of cloth deformations? A large dataset of 3D meshes deformed in realistic ways was needed. I couldn't find any datasets online and although I could programatically deform meshes, that sounded like a lot of math - I'd practically have to write a physics engine... but wait, Blender already has a physics engine! In fact, Blender already had tools for cloth simulations as well as wind simulation which was a neat way to randomly 'jiggle' the cloth mesh! By saving the mesh at different times during the sim, I could inexpensively get a synthetic dataset of realistically deformed cloth-like meshes.

It was finally time to train my own "pix2pix" model and the initial results looked very promising. See below (I've repeated and magnified the Generated and Expected images for better comparison).

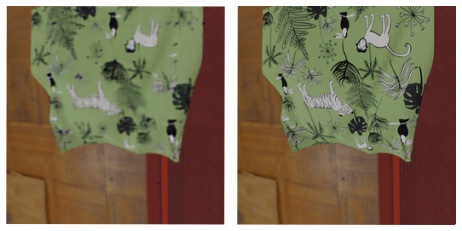
At this point I had validated that mapping designs on deformed cloth was possible. I also quickly sanity checked that real photos would work by running inference on photos of deformed regular paper print outs of the base texture. However, the generated images were not able to capture high frequency details and thus needed improvement.
I looked into ways to improve training:
- trying different architectures for discriminators and generators to change their absolute and relative abilities to each other.
- tweaking hyperparameters.
- iterating the base texture - a design that had distinctly recognisable sections would allow the model to translate more easily, like giving guide lines for generation.
I've lost the earlier iterations I made, but below are the penultimate design and ultimate design. 
Small improvements were made, but like others before me, I found training GANs to be tedious. They're inherently unstable during training and it was a fact of life that many training runs would be wasted. I needed something better.
DeOldify, fast.ai and Perceptual Loss
Reading around the internet, I came across DeOldify and its method of NOGAN. This presented a more stable way of training GANs by pretraining the discriminator and generators separately. Conventional GAN training was only needed for a very short amount of time after pretraining to transfer any knowledge the discriminator (critic) had to the generator. What is NOGAN gives a great explanation of the ideas behind the technique and it's worth a read to understand GANs better in general. These ideas were first developed by Jason Antic and then further developed in collaboration with Jeremy Howard of fast.ai. Here you can find a talk and a detailed post about it.
This looked very compelling so I decided to test it. It also gave me an opportunity to take the fast.ai framework for a spin. I immediately started getting better results. NOGAN enabled training to take advantage of transfer learning. Using a pretrained image classification resnet backbone for the generator U-Net, a large proportion of training time could be saved. fast.ai also offered neat techniques such as "1 Cycle Learning" to find good hyperparameters (learning rate in this case). The most significant change to my workflow was the use of Perceptual feature loss which fast.ai encouraged. Perceptual loss improved upon conventional feature losses such as L1 or MSE by using a fixed pretrained classifier as a loss network. My pre-trained generator could now produce images with much higher fidelity.
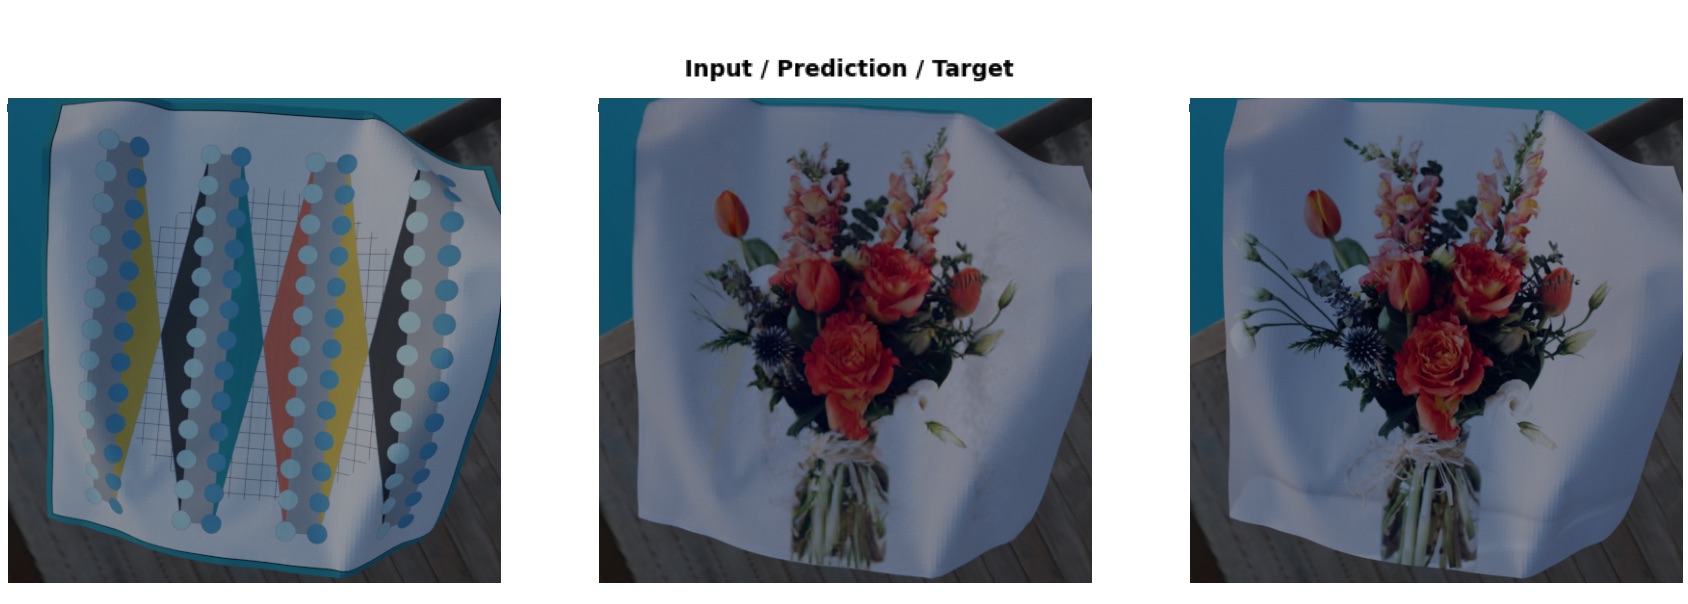
Perceptual loss was so good in fact that I found further GAN training didn't improve results noticably and could be skipped altogether (if you squint hard, the perceptual loss network is a NOGAN discriminator). This made training very reliable, saving me countless training runs, and also allowed me to standardise the training process.
Testing IRL
By further augmenting the Dataset using conventional techniques in the fast.ai toolbox (rotations, y axis flips, random crops, random occlusions, brightness/hue variability etc.) training could be made more robust for real world usecases. Examples of these training augmentations shown below:
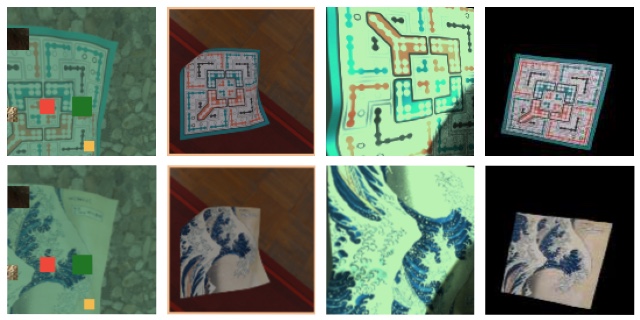
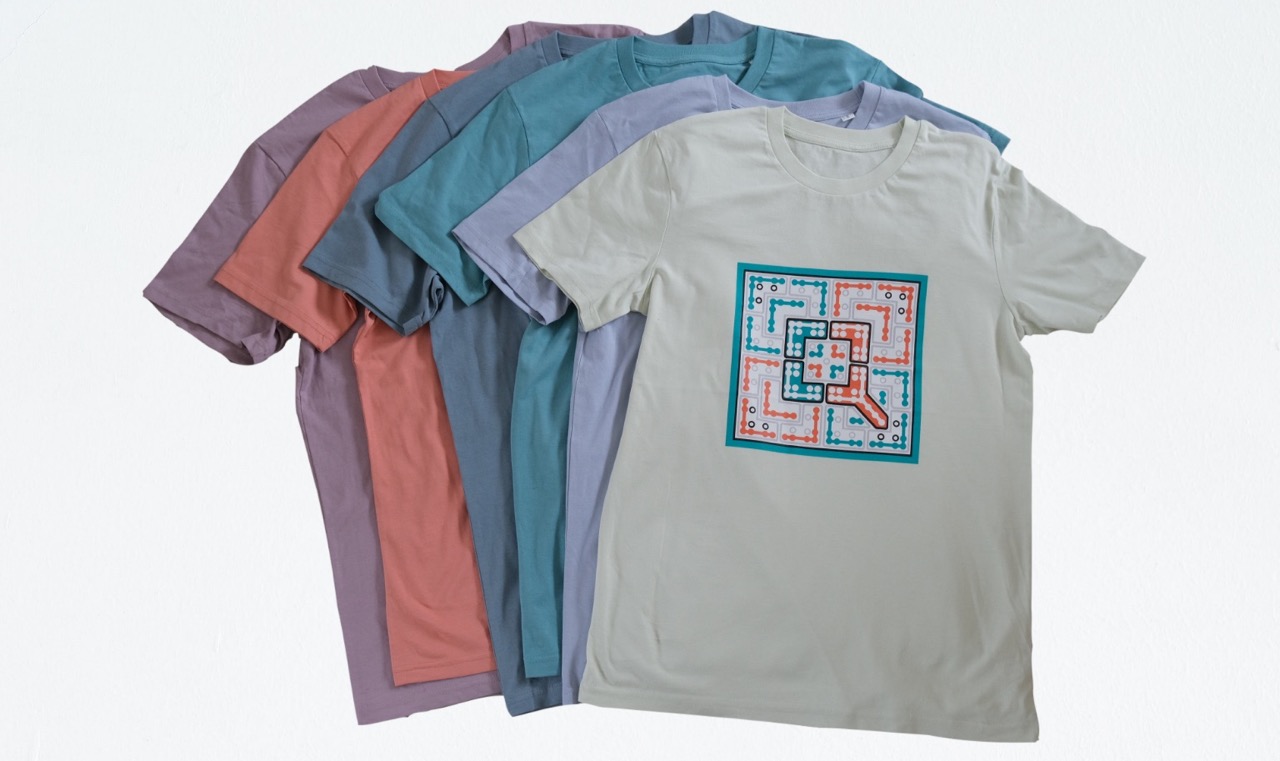
Now I was ready to print some physical t-shirts and test out my model IRL. Thanks to extensive training augmentation, inference would work on t-shirts of any color so I had a spectrum printed:
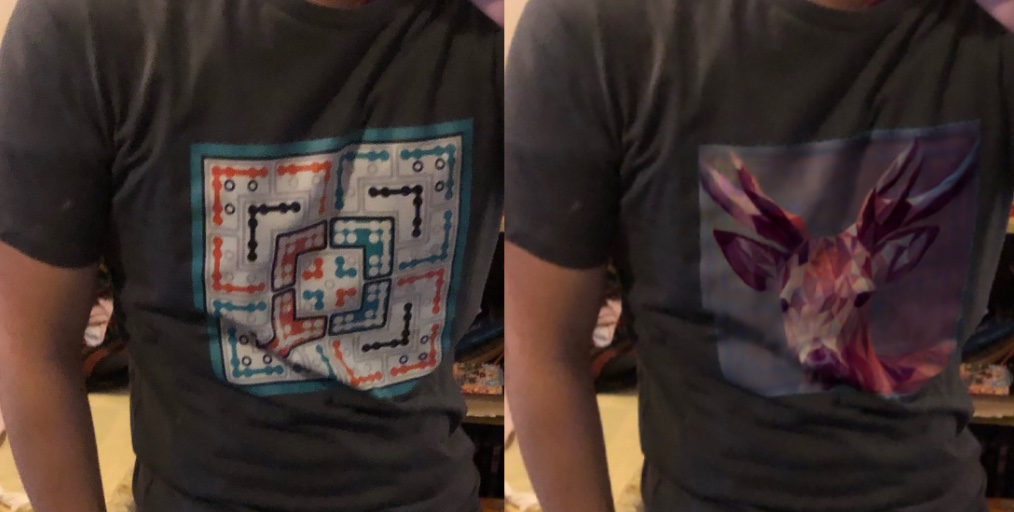
Here is an example of IRL inference in action. A challenging translation with extensive deformation that the model handled flawlessly:
I quickly put together a mobile app to allow me to run inference conveniently. Photos could be uploaded in app and would be sent to Google Cloud triggering a Cloud Function to run inference on serverless cpus. Since inference worked on a specific input image size, users were asked to fit a bounding box around the base design to allow higher resolutions of generation (this of course had room to be automated away with computer vision).
With the current set up, each set of model weights could only learn one design translation. As an engineering constraint to enable faster training for each new design, I reused a frozen pretrained (for autoencoding) encoder for the generator U-Net so that only the decoder would need to be trained for new designs.
Potential avenues for improvement here would be conditional generation models (one model to many designs). I also ran some tests for a system that would allow translations without design specific training - my theorised implementation being a model that translates a base texture to texture map coordinates. This proved challenging since CNNs are translation invariant. I experimented with proposed solutions to this problem like using CNN Coordinate Embedding, but they were experimentally lacklustre. Even if this had worked and I could accurately project a deformed texture onto the base image, a second model would be required to match lighting effects and blend the superimposed augmented design.
Real time video
Image translation inference of the models on a single Colab P100 GPUs took around 0.15s. So streamed "near real time" video was possible but at low frame rates (~7 fps). Since real time augmented video streams were the reason I started the project, I pushed on, exploring ways to speed up inference:
- using different unet backbones that were lighter for quicker inference. Architectures I tried included: ResNeXt, Wide ResNet, MobileNets, and Efficient nets (which were what I was most hopeful for). Ross Wightman provides a great collection of pretrained backbones here: PyTorch Image Models. Creating UNets for these backbones was non-trivial and I ended up spending a lot of time in Pytorch getting them to work. Unfortunately, inference speed ups weren't significant and were also outweighed by sacrifices in generation quality.
- serialising the model and running inference with ONNX runtime. For U-Nets on GPU, I did not find substantial gains in inference speed.
- technically you could also run multiple GPUs processing sequential frames to increase framerate but this was outside my project scope.
Sadly, with real time video still a 2 to 3x in performance away and no more insights for improvement, I decided to shelve the project. The demo video that I showed at the beginning of this article was rendered in post 😢
This was a really enjoyable project to work on and it was my first experience building a machine learning app end to end. It would be cool to see how I would improve this project today with better GPUs, newer ML techniques and as a more experienced engineer. Perhaps I will pick this up again when I have time to spare in the future. Until then.
